Sunday, December 26, 2010

Have a Birthday Cake for Baby Jesus!

YIP2010 - 350
Every year on Christmas day we celebrate with a birthday cake for Baby Jesus. It has been a tradition for years and years, and this year was no different. Our cake is an angel food cake, with "strawberry fluff" filling, and whipped cream tinted green. The fluff is whipped cream, strawberry Jello, and frozen strawberries (thawed). It's a good thing that Christmas calories don't count!

It's a little thing, but it is one of the ways that we make sure that Jesus is the center of this day, this season, of celebration.

We hope you had a very merry Christmas season, and that your soul rejoices each day as you remember that Jesus came to this earth because of His great love for you.

Wednesday, December 22, 2010

Make a Candle Holder!

Candle Holder
The last craft post for this season, but it's one of our family favorites! This simple candle holder can be made by even the youngest of crafters, with just a bit of help.

The base is the top of a 2-liter bottle. Once you've cut that off, simply brush on a layer of glue, and add tissue paper. You can add multiple layers, use different shapes of cut tissue, or even attach the tissue to the underside of the bottle/base.

Add a ribbon and a candle, and you've got a sweet little decoration for your Christmas celebration!

Saturday, December 18, 2010

Use Toilet Paper Tubes!

TP Shepherd
Toilet paper tubes are an excellent craft resource, and they are easy to come by. This first project is a little silly, but also kinda cute.

To make a shepherd, wrap a toilet paper tube in paper (we used tissue), then add a circle face. The head covering is another piece of tissue, glued around the top and then tied with yarn. Tie a pipe cleaner crook, and glue on a cotton ball sheep. Simple and sweet!
Tube Nativity
If you want an entire Nativity, and you don't want to look for many supplies, head over to Catholic Icing for an adorable printable set. She wraps hers onto toilet paper tubes, but we just printed ours on card stock and taped them into tube shapes. There are lots of pieces in the set, including the stable!

Wednesday, December 15, 2010

Be an Angel! Or a Sheep! Or a Shepherd!

This is the first of a couple posts sharing some fun and easy Christmas crafts that we recently did with families at church. Enjoy!

Dressing up as characters from the Christmas story is so much fun, for both kids and adults. Here are a few simple projects that will make you into angels, sheep and shepherds!

Angel Halo
An angel halo can be made with wire star trim/garland, but to make it extra sparkly, add some regular tinsel or tinsel garland. Wrap it all up and be an angel!

Sheep Hat
This sheep hat is just strips of construction paper made into a headband with ear shapes stapled on. Cotton balls complete the look, and baaaa...you're a sheep!

Shepherd Hat
Shape two pieces of tissue paper onto someone's head (it's easier to work with someone, rather than placing it on your own head). Then wrap some masking tape around the head, and now you're a shepherd!

Special thanks to Anders for modeling the sheep and shepherd. We would have made him an angel too, but thought that might be going a little far...

Friday, December 10, 2010

Learn About Christmas Around the World!

trees

We love, love, love to look at Christmas decorations, especially the ones at the Museum of Science and Industry. They have trees up from countries all around the world, as well as some display cases. You learn a lot of interesting things, and we've even been known to try out some traditional Ethnic Christmas dinners. Yesterday we learned of The Smallest Camel, a legend in Syria which says that gifts are delivered by the smallest camel of the Wise Men. Who knew?

baby

Thursday, December 09, 2010

Print Christmas Ornaments!

Nativity Ornaments

Mollie made these little printable ornaments for on her blog, Wild Olive, and we wanted to share them here too. You just print, trim, and hang them! Or, for acting out the Christmas story, attach the cut out people to popsicle sticks to make little puppets!

Sunday, December 05, 2010

Listen to Christmas Music!

Around our house, there are some rather varied tastes when it comes to music. Especially Christmas music! People are always switching the tunes, and here are a few of our favorites...

Mom: Christmas Memories by Evie (we still have this on cassette only!)

Dad: Christmas Through Your Eyes by Gloria Estefan

Mollie: Songs for Christmas by Sufjan Stevens

Anna: Swing Bells! by The Glad Singers

Anders: Holiday Spirits by Straight No Chaser

The three youngest in the family haven't started weighing in yet, but it's only a matter of time before we'll be adding to the list!

What are your Christmas favorites?

Thursday, December 02, 2010

Tag Your Gifts!

manger tags front

It may be a little early for wrapping, unless you're like a certain mom in this family, who likes everything to be wrapped before Thanksgiving. (This has resulted in needing to unwrap presents for price adjustments and/or exchanges as little people change their minds...)

manger tags back

Anyway, I whipped up some little printable tags today to share with you! Download the PDF, then trim the rectangles. Fold them in half and punch a hole on the gray dot. Loop some string through the hole and you're all set!

Wednesday, December 01, 2010

Make a Nativity!

Nativity People

There are lots of ways that you can make a little Nativity scene. Some are simple and some are much more complex. This one is really easy. We based our design on this spool Nativity, but used slightly different materials.

Nativity People Pieces

The bodies are just doll pegs in two sizes (we got them at Hobby Lobby). They are wrapped in scraps of cloth and secured with a bit of hot glue. Mary and Joseph have head coverings that are glued to their heads, and Joseph has a ribbon tie. Super simple! (Though not quite as simple as this set.)

The faces are left blank, because we rather like that aesthetic, but you could easily paint faces on.

Have fun!

Saturday, December 05, 2009

Celebrate with Stars, Angels, Sheep and the Manger!

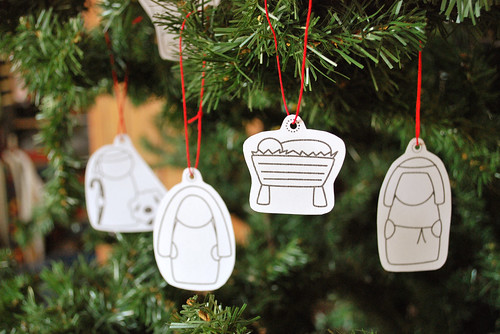
Today at church we had a family Christmas celebration with games, crafts, music...all as families. Here are a few crafts we made:

Star Topper

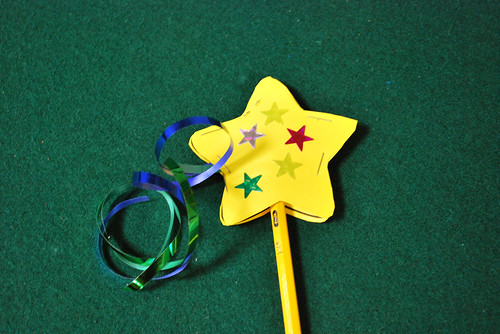
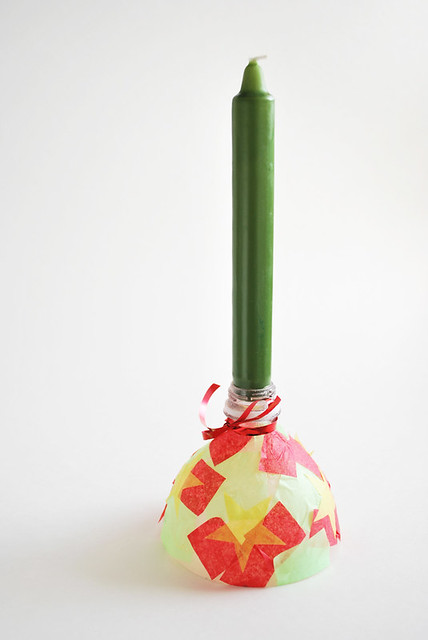
1. Cut out two stars.
2. Tape some ribbon to the back of one star.
3. Staple the two stars together, leaving a space for the pencil.
4. Decorate the star, and place on a pencil.

Angel Windsock

1. Fold a piece of 12x18" construction paper in half lengthwise, then add stars to one side.
2. Attach some streamers along one edge of the paper on the other side.
3. Cut out and add angels to some of your streamers. (a cookie cutter works well for a template)
4. Staple the construction paper into a tube.
5. Punch two holes and add a pipe cleaner for a hanger.

Plate Angel

1. Draw an angel shape, like in the photo, onto a paper plate.
2. Cut around your line.
3. Punch some holes to decorate the angel’s wings and skirt.
4. Add a bit of glitter glue for extra sparkle!

Sheep Pop

1. Wrap a napkin around a sucker, then secure with a rubber band.
2. Trim off some extra napkin so that the bottom is smooth.
3. Glue on two wiggle eyes.
4. Glue on two ears, and a snout.

Baby Jesus Spoon

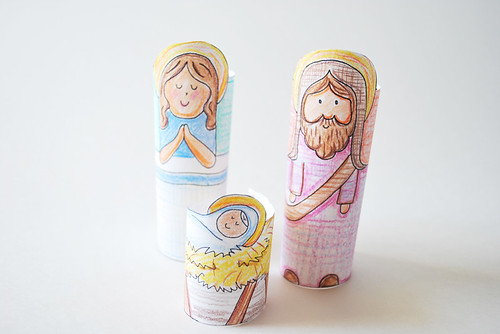
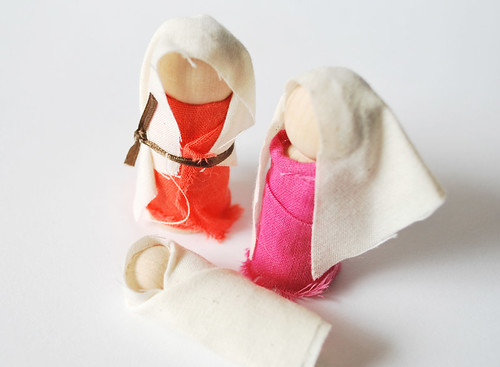
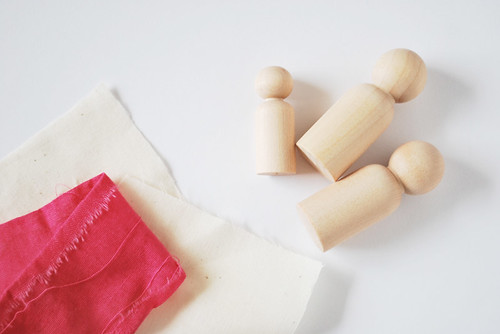
1. Draw a face on the large end of a wooden ice cream spoon.
2. Wrap a piece of cheese cloth around the smaller end of the spoon.
3. Add some glue to secure the cloth.
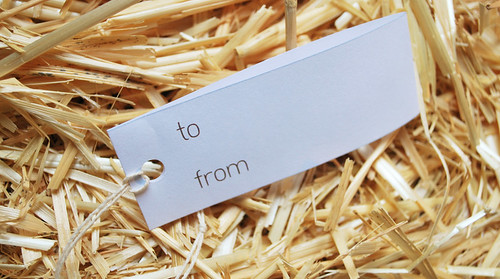
4. Tuck the Baby Jesus into some “straw”.

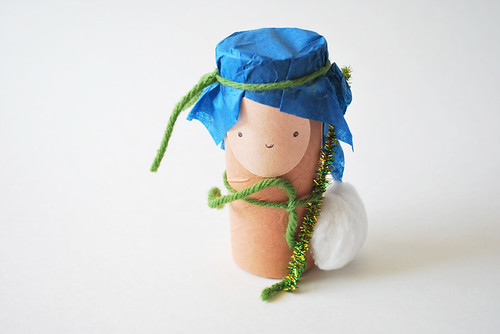
We also made Nativity scenes out of clay pots.

Pot Nativity Mary

Pot Nativity Joseph

Pot Nativity Jesus

There are lots of variations on this idea out there, but ours basically followed the instructions at this site. (I wish I had the sources for all the others, but I don't...)

Making simple things like these is a wonderful way to remember what this season is all about...enjoy!

Tuesday, December 01, 2009

Cut Apart Christmas Cards!

nativity ornaments

If you save the cards you receive each year, there are lots of ways to use them for new things. Google Recycling Christmas Cards, and you'll find plenty of ideas.

Our cards this year are designed to become ornaments...right away! Just cut apart the front, attached the enclosed string, and voila! You're set! But, if you don't want to cut it apart, or if you want extra ornaments, or you are visiting this blog but aren't on our family's Christmas card list, we have a PDF of the ornaments for you!

Make an Advent Chain!

To start counting down until Christmas, make an Advent Paper Chain. Create one loop in the chain for each day before Christmas. You can decorate the strips or add one of the following Christmas Bible verses to each loop. Each day, remove one loop. You've created your own Advent Calendar!

1. Luke 1:11-17
2. Malachi 3:1
3. Isaiah 9:6-7
4. Luke 1:26-33
5. Matthew 1:18-19
6. Isaiah 7:14
7. Matthew 1:20-25
8. Luke 1:39-56
9. Luke 2:1-7
10. Luke 2:8-14
11. Luke 2:15-20
12. Exodus 13:2
13. Luke 2:21-24
14. Matthew 2:1-5
15. Micah 5:2
16. Matthew 2:7-12
17. Luke 2:25-35
18. Luke 2:26-38
19. Hosea 11:1
20. Matthew 2:13-15
21. Jeremiah 31:15
22. Matthew 2:16-18
23. Matthew 2:19-23
24. Luke 2:39-40

Make an Advent Calendar!


There are so many ways to count down to Christmas, and Advent calendars are a tradition at our house. Lately Mollie has been finding some amazing calendars that you can make yourself! The photo above was made last year by Sonia, an internet friend of hers. Each pocket has a simple activity to do. She's got new activities for this year.

For more fun calendar ideas, check out:

Whip Up's List of 30 Advent Calendars

Red Velvet Art's Advent Calendar Kit

JennyB's Advent Calendar Tutorial

Wednesday, December 03, 2008

Stitch up a Snowflake!

Free Snowflake Embroidery Pattern

If you're a crafty sort of person, you might enjoy making something with this snowflake embroidery pattern. (It is based on our card design from last year!). To transfer to fabric, simply trace by a bright window, or use a transfer pencil/pen. Happy Stitching!

Look at snow pictures!

Let it snow, let it snow...

Wilson "Snowflake" Bentley was know for his amazing photographs of snowflakes. His up close and detailed shots really allow you to see how creative God is. Learn more about Snowflake Bentley and take in some of his snowflake art here.

Or if you want to enjoy some pictures of the world covered in the white stuff, here are a couple Flickr groups to check out: First Snow and Snow.

Tuesday, December 02, 2008

Enjoy a Treat Each Day!

Advent Gum Calendar

Did you ever have an Advent calendar where you got a piece of chocolate each day in December? We made these fun Advent calendars using packs of Trident gum. They were so easy to make, and the kids are all excited about getting a piece of gum each day. Check out My Little Mochi for instructions.

Be Optimistic!

Printable gift tag ornament

There is always so much to do in December, and wrapping gifts can get tedious. Add some fun in there with a cute gift tag/ornament. Mollie has the printable file for these cute "Optimistic Ornaments" available on her blog, Wild Olive.

Printable gift tag ornament

Monday, December 01, 2008

Cut out snowflakes!

Snowflakes

Our cards last year had individually cut snowflakes, something Mollie has wanted to do for years. And although this was daunting, (she cut out over 100, including a pile of them while sipping a gingerbread latte at Starbucks!) it was fun too. We like to cover our windows with paper snowflakes each year, and have added them to the Christmas tree on occasion as well.

It takes a bit of practice, but go for it! There are books that offer patterns to get you started and inspired to make your own. Or if you prefer to go paperless, try out Make-A-Flake and cut out some online snowflakes!

Friday, December 16, 2005

Personalize your gift wrap!

Wrapping all of those presents can be a big project, and "helping hands" aren't always so helpful. Let little ones be a part of the Christmas wrapping by having them decorate tags for the gifts you're giving. It's simple to do, helps younger children feel a part of the process, and gives your recipient a package with a little extra tender loving care. We used a Sizzix die to cut tags from card stock (rectangles work, and are super easy...), then decorated with materials we had handy. You could use sequins, buttons, paper scraps, or even just crayons and markers. It doesn't have to be fancy, custom tags made by your kids are special, no matter how they're done!

Friday, December 09, 2005

Share a Tradition!

Some traditions are just too good to keep to yourself. So share them! We've enjoyed baking cookies, making gingerbread houses before Christmas or smashing them after, or bringing friends along to a live Nativity...all with other families. It's a great way to get to know each other, and you'll create some wonderful memories!

Construct with Gingerbread!

We love making things out of gingerbread! It's fun, and not as difficult as one might expect. We moved from making the gingerbread from scratch, to buying a kit, complete with frosting mix and candy!

Here are some of the things we've learned from making a few houses through the years. First, make sure that the board you make it on is sturdy--either that, or don't plan on moving it! Next, you probably won't eat it anyway, so save yourself some grief and just hot glue the thing together. Finally, it's supposed to be fun, so don't worry about perfection! (I'll save Anna the embarrassment and not share the picture of her spreading frosting on with her hands!)

Start a New Tradition!

Sometimes we get so caught up in all the things we do every year, that we forget that it's okay to do something new and different. In the last few years we've added some new activities to our Advent celebrations. One of our favorites is a shopping trip to the dollar store.

Each child has enough money to buy one thing for each person on their list, which includes immediate family and a few others. Then it's up to them to find "the perfect gift" for everyone. This can be quite a challenge at the dollar store! The results may be sweet (Candy!), practical (A pack of screws!), or silly ("Planet of the Apes" snap together model!). And all the while, the kids do their best to keep secrets...

Try something new this year...something simple, sentimental or silly. Who knows? It may become a treasured part of your Christmases to come!

Monday, December 05, 2005

Visit a live Nativity!

Visiting a live Nativity is a great way for kids (and adults!) to see what it might have been like in Bethlehem so long ago. Our family likes to visit the "Bethlehem Faire" each year. As you enter, there's a stable of live animals. Then music sounds, and as you look up, an angel appears! Inside, they set up a miniature city full of people selling spices, animals baskets, and more. Children run around talking about a special baby that was born. Finally, you reach Mary, Joseph, and a tiny baby. It's a small space filled with straw. This year we heard Joseph comment that he hoped the straw would keep the baby warm through the night.

The visit doesn't take long, and it costs nothing. But it is part of our Christmas celebration...one that we wouldn't miss!

Friday, December 02, 2005

Keep it simple!

Growing up, one of the things that I looked forward to most at Christmastime, was painting plaster ornaments. I made bunches of them each year. Imagine my dismay when I grew up only to discover that my mom had not saved every single one of them! I now realize that she just didn't need hundreds of poorly painted plaster ornaments! But that tradition is one that has stuck with me for years...Mollie


Image Hosted by ImageShack.us


With many small hands around, breakables may not be the best thing. Not to mention all of that paint! To keep things a little simpler, we've started decorating wooden ornaments. You can purchase a pack of printed wooden cut-outs, along with some markers and glitter glue. They are easy to do, and it's something the whole family can do together...little ones and big ones alike!

Saturday, December 04, 2004

Create a Christmas alphabet!

Sit down with your family and think of all the things that remind you of Christmas. Icons that everyone loves, family traditions, funny memories. Write down one thing to go with each letter of the alphabet: B is for Baby Jesus, U is for Uncle Bob sitting in the Christmas tree, etc. Some letters may require that you get creative! If you feel like being artistic, you could even draw pictures to go with each letter. This is a great way to share your favorite Christmas things with each other!

Friday, December 03, 2004

Play with a Nativity scene!

Children are often intrigued by Nativity scenes, however, many are breakable and not safe for them to play with. The Mary from our Precious Moments set had a collision and lost her head when our oldest daughter was playing with the pieces. She was so excited! Let children experience this Christmas by giving them a Nativity scene of their own. One that they can play with. A soft stuffed set for younger children. A plastic set for elementary children. Even a small glass set for older children.

Encourage children to play out what happened on the first Christmas and what each person involved would have said or thought. This is a great way for younger children to learn about Christ's coming.

Thursday, December 02, 2004

Read Christmas books! Watch Christmas videos!

Don't forget to enjoy Christmas books and videos with your children, nieces and nephews, or simply with other friends and family. Read children's stories: Max Lucado's Jacob's Gift, Jan Brett's Gingerbread Baby. Read a classic: Charles Dickens' A Christmas Carol, Valentine Davies' Miracle on 34th Street. Watch a kid video: The Best Christmas Pagent Ever, Elf, How the Grinch Stole Christmas. Watch a classic video: It's a Wonderful Life, The Original Miracle on 34th Street, anything from Rankin/Bass (Rudolf, Santa Claus is Coming to Town, etc.)

Get into the spirit of the season!